Sunday, June 30, 2013

Sketchbook Pages

 
I spent an afternoon painting in my moleskine sketchbook a couple of weeks ago while waiting for my husband and daughter to ride their bikes down the Pa'rus Trail.  They are able to tolerate the heat better than I do so I stayed in the shade near the river. 


Sunday, November 18, 2012

Handbuilt Porcelain Box


Handbuilt Porcelain Box 
4 1/2" dia. x 3 1/2" high
Light Blue Celadon Glaze

Below you will see a couple of photos of my building process.  This piece is now in my "permanent collection" because I like it so much and it inspires me.  I may re-fire it as a bit of alumina hydrate drifted to the edge of the glaze on the bottom half and so I need to retouch the glaze there.  Alumina hydrate is painted on the flange to keep the two clay surfaces from fusing together during the firing. 


This photo shows the clay sheets I have rolled out and cut into sections for the wall of the box, the lid, bottom  and a strip for the flange. I have already laminated thin triangle shapes of colored slips in a pleasing pattern onto the wall section of the box and  pressed them in with a rolling pin.  After painting porcelain slip on the underside of the shapes I place more of them onto the sheet that will become the lid. The slip helps create a bond between the two surfaces.  The lid section is then also pressed with a rolling pin and trimmed into a circle.  


Just to the right of the newly formed box you can see the temporary form used to wrap the clay sheet around and hold it upright while I seam it and add the bottom section.  I had flipped it over and pulled the form up and out.  This form was made from foamcore and held together with masking tape.  When I decide if I like the shape of the new piece I will make a bisque mold from clay in the same shape and in the future use that to form the pieces around as a bisque mold releases the damp clay piece easily.  My handbuilt pieces are then dried slowly, bisque fired and then glazed fired.  I have displayed quite a few of these boxes in different sizes, shapes and colors at the Tivoli Village market here in Summerlin on Saturday mornings along with our wheel-thrown pottery and we have had an excellent response to them.  I've also been very busy in the painting studio working on oils from reference sketches and photos taken during our recent trip to Zion National Park.  We spent a few days in the park to observe "In the Footsteps of Thomas Moran", the Plein Air Painting Invitational 2012,  and to enjoy the gorgeous fall color along the Pa'rus Trail and in the Narrows section of the canyon.  Once again, the world-class color of the sandstone cliffs and foliage were breathtaking.     

Sunday, September 16, 2012

"Tumbling Triangles" Porcelain Lidded Vase


This is a picture of me placing one of the last pots to be fired in the kiln.  We glazed most of the first week of September and fired on Monday the 10th.  By Wednesday the kiln was cool enough to open and the next picture shows how the pots looked after a cone 10 firing.  Cone 10 means reaching 2350 degrees.


Opening a kiln is a little like Christmas morning.  It's exciting because you never know what you're going to get.  Some things will be wonderful and a few things will not make it.  There is a high loss rate with porcelain because it can change shape, shrink, slump or the glaze can run too much and pool on the shelves.  But the translucency of the clay body and the luscious tints of the celadon glazes make it all worth it.  


This is one of my finished pieces from this firing.  It is glazed with a celadon, a gorgeous yet subtle shade of apple green.  The color shapes were added on after the vase was thrown on the wheel. It was carefully dried, then sanded, and bisque fired to make it strong enough to withstand the glazing.  To explain further how I did the color shapes, I paint a separate sheet of thin clay with colored slips in an abstract expressionist manner and then cut shapes from that sheet to design and apply patterns on the vases.  The beauty of painting in oils and making pottery as well is that the oil painting has made my approach to the slip work more layed, thicker, and painterly. The handle on the lid was handbuilt using the nerikomi method of pressing color shapes into a small sheet of clay and then rolling it into the desired shape.  I like to call this pattern "Tumbling Triangles".     

Thursday, August 16, 2012

Nerikomi Porcelain From Our Gas Kiln


I have been working in the clay studio with my husband this  past month .  He  works there everyday and I am usually in my painting studio.  But he talked me into finishing some pieces I started a few years ago and carrying on in  the direction I was going at the time.  So this is a photo of a glaze firing we did this past Monday.  Bill made most of the pots in  this firing.  There were 90 pieces in all.  But 20 of them were mine and I'm very happy with them.  It felt wonderful to handle porcelain again and play with patterns of colored clays on the shoulders of the pieces.  Below is a photo of some of the work.  


The tall faceted bottle in the foreground is one of Bill's o'hata red pieces.  The vases behind the bottle are some of my nerikomi porcelain work.  The pots didn't stay on this table beside the kiln for long.  We are having 110 degree heat nearly everyday here in Las Vegas so we unloaded the kiln, took some quick snapshots and carried everything inside and out of this heat wave.  

Friday, March 16, 2012

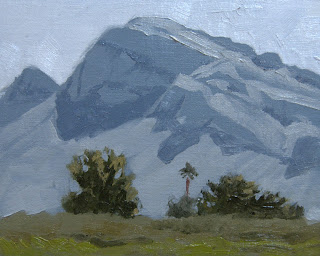
Plein Air Landscape Oils From Tucson


"Trail Leading to the Catalina Mountains"
10" x 8" oil on linen panel

My husband and I spent last week in Tucson while I took a workshop from Kenn Backhaus at the Tucson Art Academy. The teaching was excellent and the weather was perfect. The class worked in the studio for a couple of days where we were challenged by exercises including painting from a reference photo tacked to the easel up-side down. We also were instructed to paint a landscape from memory. This was especially valuable because I didn't realize I had the ability to do it. I have added new elements to a composition but I had not painted the entire scene from my imagination. So we're home now and I'm putting newly learned methods to work on the Mojave Desert after a great week painting the Sonoran Desert.


An 8 x 10 of the mountains across from the arroyo.


Painting along side of an arroyo in Tucson.


Working at a state park just above the city of Tucson.


Working on an 8 x 10 oil of a couple of palo verde trees.


Sunday, February 5, 2012

My Husband's Porcelain in Watercolor


While working on an oil painting of nearby Turtle Peak yesterday, I took a break for lunch and while sitting at the dinning room table I felt inspired to try a sketchbook page in watercolor of my husband's beautiful calico glazed porcelain. We have an old wooden chest near the window and it is covered with dozens of his pots. I have always liked the haphazard way they form interesting compositions. This vignette is painted in a new Fabriano Venezia sketchbook of fine drawing paper. The paper is really nice to work on. A colored pencil line just glides on and it has just the right amount of texture. I was surprised how well it takes the watercolor as well, but lifting back to light is really not possible so I added the highlight reflections with a little gouache.